
Did you enjoy the content?
Share it on your favorite social network so other people can enjoy it too!

Disclaimer: Some of the links on this page are affiliate links. This means that if you click on the link and purchase an item, I might receive a commission at no cost to you. I only recommend products I have personally used and I love.
If you have an email address, chances are you got something like this at least ONCE:

This is an amazinggg way to get you know your audience better.
So what is this about?
Basically, we are letting our audience segment themselves. Meaning that with just one click, we can add them to a particular “bucket”. [New to email segmenting? Read this post first].
In this article, I will be showing you how to create something like this for yourself using my favorite email marketing tool, Active Campaign.
If you use a different tool, you can scroll down to the bottom where I linked the help articles on how to do this for some other tools.
Spoiler alert: Is easier than you think.
Before we get started with the technical aspect of segmenting, we need to have a couple of things in place.
First, define our buckets. By buckets I mean the categories we want to group our audience.
As an example, I’ll use my own email from before. In my case, I want to know in which of the following 4 categories my audience falls into:
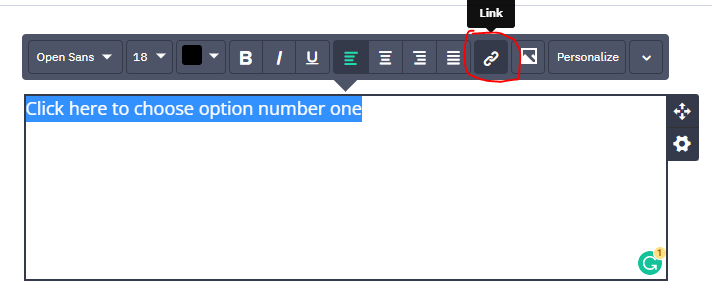
Depending on your email marketing tool, you might have to create one page per option (more on that later). But as a general rule, if they click on a link, that link needs to land somewhere right?
So, whatever your page builder is (or honestly, it can even be a google doc saying thank you!), just create a suuuper simple page where they can land after they click on an option. As an example, here is mine.
Okay, this part is completely different depending on your email marketing tool. I’m going to give you examples on how to do this on my 3 favorite tools: ActiveCampaign, Convertkit, and Mailerlite.
If your tool is not listed here, just search within your tool’s manuals! You can usually find it under “Link triggers” in their documentation section.
So let’s dive in:
Before we get started, note that ActiveCampaign has one small downside: For click segmentation, you will need to have a different URL for each option. Meaning that if you will give your readers 4 different options to choose from, then you will need to have 3 different pages to send them to, since AC will only apply one tag to one URL (if you use the same link more than once, the same tag will be applied each time, instead of different ones like we wanted)

And if you’re more of a video learner, here is a quick one showing you how to do the above:
If they toggle the option to add email templates, like shown above, they will be automatically added to the total amount.
Having this option on your checkout page significantly increases your average order value.
Want to try ActiveCampaign?
There you have it! This is a super fun and easy way to get to know your audience better.
Let me know if you try it!
Share it on your favorite social network so other people can enjoy it too!